Showing posts with label DIY Projects. Show all posts

Friday, June 3, 2016

Bathroom towel bar

I love to revive or restore something I found for cheap (or even better, for free). I picked this shelf up at a thrift store (75¢) and I decided that I could change it a little and definitely put it to use. At first, I spray painted it with some bronze paint that I already had, and it was immediately looking much better.
I knew I wanted it to go in our upstairs bathroom, but we were doing some work in there, so I put it aside for a few weeks.
Once the bathroom was repainted and ready, I decided I wanted it to be chrome to match the other fixtures. I just spray painted it again. Again, I already had that spray paint, but it usually costs about $5 for a can. Then I picked up a small bottle of white craft chalk paint at WalMart ($3) and lightly painted the wood shelf. I have already used that paint on two other projects! 

I bought the glass bowl at the Dollar Tree, already had the moss, and got the succulent at WalMart at the same time as the paint ($1.77). 
It love it! It is a great alternative to a traditional towel rack and I can display a couple of pretty things while keeping the countertop from getting too cluttered. Pretty and functional. And cheap! That is my kind of project.

Friday, May 20, 2016

Grout Renew

Hello Friends, and Hello Friday!!
We have only 5 days left until the end of school and we are all looking forward to summer fun over here. I have several things on the agenda to share with you, so check back often!

Today I'm sharing how I updated our kitchen tile's grout. Our home has a pinkish tile throughout the kitchen floors, with a very dark grout. Since completely replacing the tile is not in the game plan right now, I thought I'd give this a try and I have been very pleased.
First off, because it was a large area, it took me about 2 weeks to finish. I would work for about 45 minutes most nights after the kids had gone to bed. I used a tiny little craft brush and just painted this stuff over the old grout lines.
I had to go slowly (not easy for me) and it was also tough on my back. That being said, the bottle cost me $12.50 and I used right at half the bottle for the kitchen, which is a pretty good size. It has been 8 months since I did this and it has held up great. I haven't noticed it chipping much or anything, but when I feel like any areas may need to be touched up, I still have plenty of it to do just that.

Before:
After:
If replacing your tile is just not an option, but you want to brighten or clean up your grout, give this a try! I only found this brand at The Home Depot and nothing really similar at Lowe's.

Here are links to the brand and color I used. There are several choices out there:
Polyblend Grout Renew - The Home Depot - $12.47
Polyblend Grout Renew - Amazon - $33.64

And links to some others who have done this as well:
Snapguide
Young House Love

Have a wonderful weekend!

Friday, February 12, 2016

Book photo artwork

Here's a little tip for saving money on some unique artwork. I love thrift stores. I love sifting through and finding things I deem valuable or interesting or pretty in a junky setting. It's not for everyone but it is definitely a hobby of mine. I especially love to find old books. I knew I wanted to change our boys' room from an airplane theme to more of an outdoors theme when I took the crib down and our youngest officially moved into his "big bed". I probably change the "theme" of their rooms entirely too often, I admit. Anyway. I was on the lookout for some good pictures for their room and also for another room in our home. I ended up using this book for the boys' room and here is my technique.

First of all, this hardback 9x13 book was 25¢ so I knew that even if I totally messed it up, it wasn't too much of an investment! I scanned through it in the store and decided I liked several of the photos in it. Even at just a quarter, there is no reason to buy something unless you are fairly sure you'll use it.
I disassembled the book with my exacto I knife, taking care to be gentle and not rip pages.
Once I got the cover off, it looked like this:
I cut off the strings that bound the book and was left with single sheets of paper -- just what I was looking for.
Most of the pages I did not need to keep, so I went through and tossed out the pages I didn't plan to use for anything. I like to keep things I think I will need and find great satisfaction in discarding things that I know I will not use.
I just replaced the airplane photos that were already in these frames. The plane photos also came from a book--this was a different room, when I was pregnant with our middle son, so about 5 years ago. I moved these photos into a different room when the two youngest joined rooms. TMI...
...and we have a whole new look in there for 25¢ and a little bit of time.
This idea can be used for so many purposes in so many areas of your home, so if you're looking for some new artwork, check the book section at your local thrift stores! The books are not always that cheap, but it's a good start. And how cute is their new room!? Mostly decorated with items I recently got at my grandparents' house. Win/Win!

Wednesday, January 27, 2016

Silhouettes

Lately it seems that all I have shared are ideas for cleaning and/or organizing. I clean our house, and I do enjoy organizing, but this. This is my thing. Random little cheap crafts are my thing. At least, this is what I enjoy doing.

My mom found this silhouette paper somewhere and got it for me because she knows I like this sort of thing. Plus she's sweet!
It looks blue, but that's just the cover sheet. The pages are black on one side and white on the other. I'm sure you can get something like this at any craft store. Here it is on Amazon.
Really, though, black card stock paper would work just fine.

Step One:
Take profile photos of whatever you want. I chose my three little ones. And I took these pictures with my iPhone.
Step Two:
I loaded the photos to my shutterfly account through the app on my phone.

Step Three:
Then I logged onto shutterfly from our laptop. I rotated the photos sideways so they would be larger and zoomed in as much as I could and still see everything I wanted included.
Step Four:
I put a sheet of computer paper up onto the screen and traced the borders of the photo with a pencil. I did this on three separate papers, one for each child.
Step Five:
I carefully cut out each one where I had traced around the faces. 
Step Six:
I taped the white paper to the silhouette paper.
At first, I taped it to the black side {wrong!}, so don't do that! I took off the white paper profile I had cut out and then taped it to the back side of the silhouette paper. I made sure to pay attention to which way I wanted the faces to be pointing.
Step Seven:
Cut out the profile again, this time including the black paper that you taped it to.
A little bit of the white paper showed over the edges, so I just trimmed those off so they weren't visible from the front.
Step Eight:
I already had these three frames, so I just taped them down on a white sheet of paper. You could add these to any frame of your choice, but there are all sorts of fun things to do with a silhouette picture. I included links to some ideas at the bottom.
Here are some other great ideas for what to do with your silhouettes:
 
I also have a silhouette picture of our two puppies in their "Dog Area" so I do really love silhouettes!

Tuesday, November 17, 2015

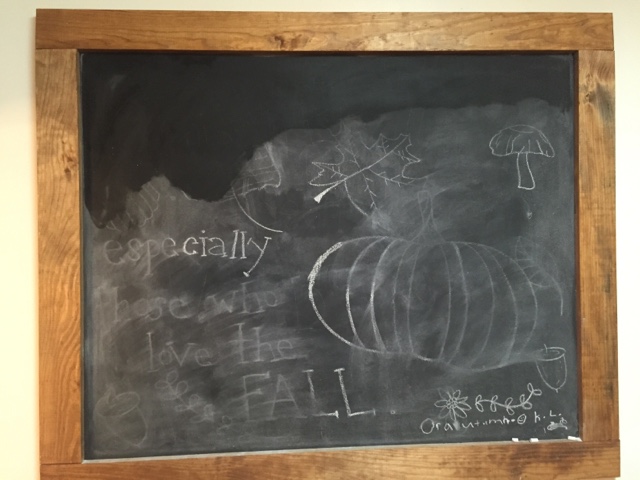
Cleaning a chalkboard

Who doesn't love a good chalkboard these days?! I love small ones, gigantic ones, walls painted with chalkboard paint. I've done them all. BUT, when it's time to really clean them, this is what has worked for me.

First of all, I read that you are supposed to "season" a chalkboard. That means you take a piece of chalk, turn it sideways and completely cover the chalkboard. Then, you wipe it off with a paper towel or eraser. If you don't do this, it is likely that whatever you draw onto the board the first time will be very hard to remove. Read here all about How to Prep + Season a Chalkboard.

This is generic Windex. It is indeed called "L.A.'s Totally Awesome Window Clean". I buy it at Dollar Tree and it works as well or better than Windex.
You guys, this gigantic chalkboard makes me so happy. It is beautiful. And I did not have to make it. Or pay for it! I highly suggest you get yourself a talented, beautiful, generous, crafty sister-in-law (or 4 or 5 like me) and let them make pretty things for you. I LOVE THIS THING. One of my many sisters-in-law (AKA my best friends) made this for me just because she is sweet as pie. I believe my buddy used this tutorial here: How To Make Your Own Chalkboard.
 
I made sure to season this guy before I started writing on it. Then I used a chalkboard pen. And it still did not want to wipe off easily, so I panicked and then started trying to clean it off with all the stuff in our cabinet. The Totally Awesome (haha) window cleaner is the only thing that really worked. I used a dry washcloth and started wiping it all over from top to bottom. 
Here she is all dry. You cannot see where I originally wrote "This has all been wonderful." and it makes me feel wonderful. 
And now I can use it as part of a baby shower decorations, or whatever I feel like and the window cleaner does a good job cleaning it off. Hip Hip Hooray!
Chalkboards belong in multiple locations in every room, wouldn't you agree??

Wednesday, October 28, 2015

No Sew Curtains

I had a fairly inexpensive sewing machine, and I just had a hard time with it! I would love to be able to sew and maybe one day I can get a nice one and actually learn to use it. For now, I hand sew very small things (buttons, hems, etc.) and I use fabric glue for my little DIY projects.
This is my Go-To bottle, which I purchased at Hobby Lobby:
There are lots of great tutorials out there for making your own curtains. I've done several different things here in our home, but the most recent was in our master bedroom. We have a long, narrow room and the bed makes the most sense along the back wall, between two windows. I've had really dark brown curtains hanging in the past, but I lightened it up about 2 years ago with some valence curtains we already had. Sorry the photo quality is so bad!
I was on the lookout for some curtains, but was having trouble finding what I wanted for less that $30/panel. I had decided I would just buy fabric and make my own, when I came across the trusty clearance end cap at Target. These were actually 104" tablecloths, but I liked the pattern and the fact that they already had a hem! They cost $13.98 each.
 I laid each one down flat, folded the top over about 3 inches. I just made sure that each curtain was folded the same amount so they would hang evenly. Then I slowly glued down my "hem". I let them sit overnight and they were ready to go the next morning. I ironed them both really well, then put the curtain rod through the little hole I'd made, and hung them up.
I moved the curtain rod up as far as I could. I measured down from the bottom of the crown molding so the rods would both hang at the same level.
I put them up a few months ago and I haven't changed them, so if you know me that means I must like them!
I think I will always be pleased with this room as long as it's not PURPLE (like when we bought it!). It's all about perspective, isn't it?
Here are a couple more ideas for making your own no sew curtains: